How to Replace a Bathroom Exhaust Fan Without Risk
If you’re wondering how to replace a bathroom exhaust fan safely, start by turning off the power at the breaker. This crucial step protects you from electrical accidents. Building codes typically require bathrooms to have at least 50 cfm airflow, but older fans often provide less than 13 cfm.
Choosing the right size fan and installing it properly is essential to keep your home safe.
After installation, test the fan’s airflow to ensure it meets safety standards.
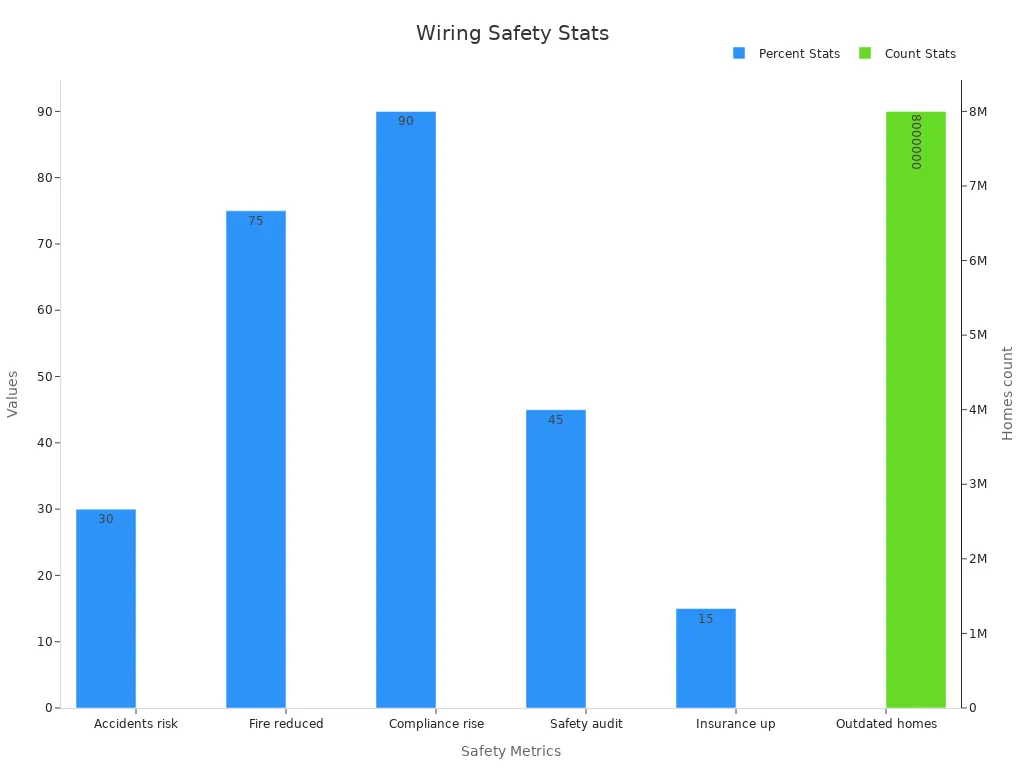
If you notice old or damaged wiring during the process, it’s best to call a professional. Many home electrical accidents result from poor grounding. Following the correct procedures can reduce fire risk by 75%.
Key Takeaways
Always turn off the power at the circuit breaker first. This helps you avoid getting shocked or hurt.
Use the correct tools for the job. Wear gloves and goggles to protect yourself and work safely.
Test the new fan after you put it in. Make sure it works and moves air well. This stops moisture and mold from building up.
Safety Tips
Turn Off Power
You must always shut off power at the circuit breaker before you start working on your bathroom exhaust fan. This step keeps you safe from electrical shock. Experts agree that turning off the power is a basic rule for any electrical project. It helps prevent accidents and lowers the risk of fire or injury. Never skip this step, even if you think the switch is off. Use a voltage tester to double-check that no electricity flows to the fan.
Use Proper Tools
Choose the right tools for the job. Insulated screwdrivers and pliers protect you from electric shock. A voltage tester helps you confirm the power is off. Keep your tools clean and dry. Good tools make the work easier and safer. If you use the wrong tool, you might damage the fan or hurt yourself. These tips help you avoid common mistakes.
Wear Protective Gear
Wear gloves and safety goggles when you work on your bathroom fan. Gloves protect your hands from sharp edges and wires. Goggles keep dust and debris out of your eyes. You may also want a dust mask, especially if you see dirt or mold. Protective gear is important for both safety and cleaning. You will need to do some cleaning before and after the job.
Check for Asbestos or Mold
Before you remove the old fan, look for signs of asbestos or mold. Older homes may have these hazards in the ceiling or around the fan. If you see anything that looks like mold or old insulation, stop and call a professional. Do not try cleaning or removing these materials yourself. Mold can cause health problems, and asbestos is very dangerous. Always put safety first when working in your bathroom. These tips help you avoid hidden dangers and keep your home clean.
Preparation for How to Replace a Bathroom Exhaust Fan
Gather Materials
Before you start, make sure you have all the tools and supplies you need. This step helps you avoid delays and keeps your project organized. You will need:
Screwdriver (Phillips and flathead)
Voltage tester
Replacement fan
Wire nuts
Electrical tape
Ladder or step stool
Safety gloves and goggles
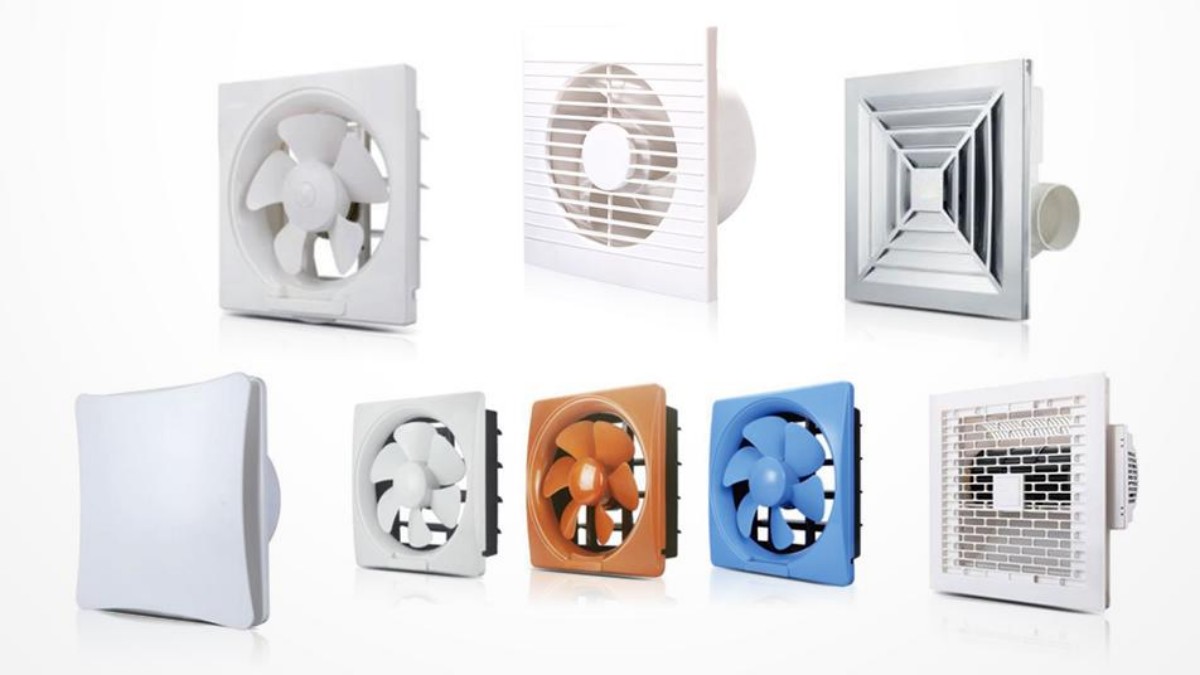
You may also want a dust mask if your bathroom has poor ventilation or visible dust. For a reliable replacement, consider fans from LONGWELL. Their products offer strong airflow and quiet operation.
Read Instructions
Take time to read the instructions for both your old and new fans. Each model can have different steps. The manual will show you how to replace a bathroom exhaust fan safely. Look for diagrams and safety warnings. If you do not understand a step, check the manufacturer’s website or contact customer support. Good instructions help you avoid mistakes and finish the job faster.
Tip: Keep the manuals nearby during the project. You may need to check them more than once.
Prepare Work Area
Clear the area around your bathroom fan. Move any items that could get in your way. Lay down a drop cloth to catch dust and debris. Make sure your ladder stands on a flat surface. Good lighting helps you see wires and screws clearly. A clean and safe work area makes it easier to focus on how to replace a bathroom exhaust fan without risk.
Bathroom Exhaust Fan Removal Tips
Before you start removing your bathroom exhaust fan, double-check that the power is off. Use a voltage tester on the wires to make sure there is no electricity. This step keeps you safe from shocks and accidents.
Remove Fan Grille
Start by taking off the fan grille. Most grilles have small metal springs or tabs that hold them in place. Gently pull down on the grille. Squeeze the springs together and slide them out of their slots. Set the grille aside in a safe spot. If you see dust or debris, use a vacuum or a damp cloth to clean the area. This makes it easier to see what you are doing.
Tip: If the grille feels stuck, wiggle it gently. Do not use too much force. You do not want to crack the ceiling or break the grille.
Inspect Internal Parts
Look inside the fan housing. Check for screws, clips, or other fasteners that hold the fan in place. Take a moment to look for any signs of damage, mold, or old insulation. If you see anything that looks unsafe, stop and call a professional. Use a flashlight to see inside the housing. Make sure you can reach all the parts you need to remove.
You may want to take a photo of the wiring and the fan’s position. This helps you remember how everything fits together when you install the new bathroom ventilation fan.
Disconnect Wiring
Find the wires that connect the fan to your home’s electrical system. Usually, you will see black, white, and sometimes green or bare copper wires. Before you touch anything, use your voltage tester again to confirm the power is off.
Carefully unscrew the wire nuts and separate the wires. Do not pull on the wires. If you see any damaged or frayed wires, stop and get help from an electrician. As you disconnect each wire, label them with tape or write down their positions. This step makes it easier to reconnect everything later.
Note: Documenting the wiring is one of the most important tips for how to replace a bathroom exhaust fan safely.
Detach Housing
Now you can remove the fan housing from the ceiling. Some housings use screws, while others have metal brackets or clips. Use your screwdriver to loosen and remove all fasteners. Hold the housing with one hand so it does not fall.
Gently lower the housing. Watch for any ductwork or vent pipes attached to the fan. If you see a flexible duct, loosen the clamp or tape that holds it in place. Be careful not to tear or damage the duct. If the duct feels stuck, work slowly and use both hands for better control.
Step | What to Watch For | Tools Needed |
|---|---|---|
Remove Grille | Dust, stuck springs | Hands, vacuum |
Inspect Parts | Mold, insulation, wiring | Flashlight, camera |
Disconnect Wiring | Damaged wires, labeling | Voltage tester, tape |
Detach Housing | Ductwork, falling debris | Screwdriver |
After you remove the old fan, check the opening for any leftover debris or sharp edges. Clean the area before you install the new fan. This keeps your bathroom safe and ready for the next step.
Installing the New Fan

Secure Mounting
Start by placing the new fan housing into the ceiling opening. Hold the housing steady with one hand. Use your other hand to line up the screw holes with the ceiling joists. Insert the screws and tighten them until the housing feels secure. Do not overtighten, or you might crack the housing. Always follow the manufacturer’s instructions for mounting. Each fan model may have different steps or hardware. If you use a LONGWELL fan, you will find clear instructions and sturdy mounting brackets. A secure fit helps prevent noise and vibration later.
Tip: Double-check that the fan sits flush with the ceiling. Gaps can cause air leaks and reduce performance.
Connect Duct and Wiring
Next, attach the duct to the fan’s outlet. Slide the duct over the fan collar. Use a clamp or foil tape to seal the connection. A tight seal keeps air moving out of your bathroom and stops moisture from leaking into the ceiling. Connect the wiring by matching the wires from your home to the wires on the fan. Usually, you will connect black to black, white to white, and green or bare copper to the ground screw. Twist wire nuts onto each connection and wrap them with electrical tape for extra safety. Tuck the wires neatly into the housing.
Always follow the wiring diagram in the manual. If you feel unsure about any wire, stop and ask a professional for help.
Test Before Finalizing
Before you close up the fan, you need to test its operation. Turn the power back on at the breaker. Flip the wall switch to see if the fan runs. Listen for smooth, quiet operation. Hold a piece of tissue near the grille opening. The tissue should pull toward the fan, showing that air is moving out of the bathroom.
Testing the fan involves checking running current, fan speed, and airflow. This step helps you confirm that the fan works as designed.
Many experts use checklists and drawings to document the process. These steps make sure the fan meets safety and warranty requirements.
Testing also helps you spot problems early, like poor airflow or loud noises.
Safety and access checks are part of the process. Only qualified people should handle electrical testing.
If you use a LONGWELL bathroom exhaust fan, you will notice strong airflow and quiet performance. Their fans meet strict quality standards.
Note: Always test the fan before you finish the installation. This step helps you avoid extra work if you need to fix something.
Attach Grille
Once you know the fan works, turn the power off again. Attach the grille by squeezing the metal springs and sliding them into the slots on the housing. Push the grille up until it sits flat against the ceiling. Turn the power back on and run the fan one more time. Step outside and check the exterior vent. You should feel air blowing out. This check confirms that the ductwork is clear and the fan moves air out of your bathroom.
A well-installed grille gives your bathroom a clean look and helps the fan work at its best.
Final Checks and Clean-Up

Inspect Work
You should start by checking your work before you finish. Look at the fan and make sure all screws and wires are tight. Check that the fan sits flat against the ceiling. Use your fan maintenance checklist to confirm you did not miss any steps. Good inspection helps you avoid problems later. If you see dust or debris, do some cleaning around the fan and the bathroom ceiling.
Restore Power
Turn the power back on at the breaker. Flip the switch to test the fan. Listen for smooth and quiet operation. Hold a tissue near the fan grille. The tissue should move toward the fan, showing that air flows out of the bathroom. If the fan does not work, turn off the power and check your wiring again. Cleaning up any leftover dust or tools helps keep your work area safe.
Clean Up
Cleaning is a big part of maintaining bathroom exhaust fans. Wipe down the fan grille and the ceiling with a damp cloth. Pick up all tools and throw away any old parts. Sweep or vacuum the floor to remove dust. Cleaning the area helps prevent mold and keeps your bathroom fresh. You should also clean the fan blades and housing if you see any dirt. Regular cleaning makes future fan maintenance easier.
Tip: Make cleaning a habit after every project. This keeps your bathroom safe and your fan working well.
Monitor Performance
Keep an eye on your fan after installation. Listen for new noises or vibrations. Watch for signs of poor ventilation, like foggy mirrors or musty smells. Studies show that monitoring fan performance during final checks can detect up to 90% of ventilation issues. This means you can catch problems early and fix them before they get worse. Cleaning the fan every few months helps you spot trouble fast. Maintaining bathroom exhaust fans with regular cleaning keeps your home healthy and comfortable.
Task | How Often | Why It Matters |
|---|---|---|
Cleaning Grille | Every 1-2 months | Prevents dust buildup |
Cleaning Fan Blades | Every 3 months | Keeps airflow strong |
Cleaning Ductwork | Twice a year | Stops mold and odors |
You can change a bathroom exhaust fan without getting hurt if you follow these tips: First, always turn off the power at the circuit breaker before you begin. This keeps you safe from electric shock. Wear a dust mask so you do not breathe in dust or mold. Check if you need any permits and make sure you follow building codes. Pick a good fan from LONGWELL for better results. If you are not sure what to do, ask a licensed electrician for help.

FAQ
How often should you clean your bathroom exhaust fan?
You should clean your bathroom exhaust fan every three months. This helps remove dust and keeps the fan working well.
Can a bathroom exhaust fan help control humidity?
Yes. A bathroom exhaust fan removes moisture from the air. This helps lower humidity and prevents mold growth.
What should you do if your new fan is noisy?
Check if the fan is mounted tightly. Loose screws or parts can cause noise. If the noise continues, contact the manufacturer.